

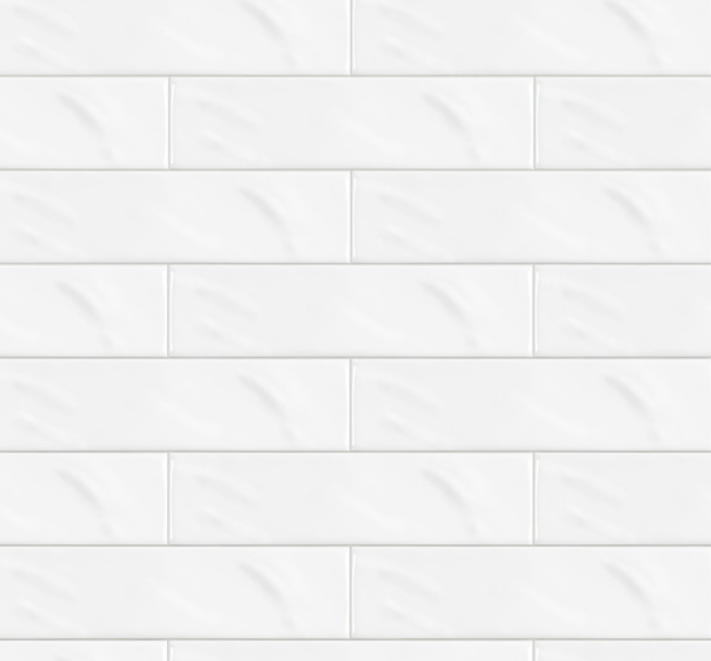
Satori 3″ x 12″ Pearl White Glossy Glossy Ceramic Wall Tile
- Smooth glossy finish adds simple elegance to your interior décor. The unique texture of a hand molded design delivers class and sophistication. Gentle movement and surface variation provide an artistic vision.
Discover the Perfect Balance of Form, Function, and Elegance for Your Home
Walking into a beautifully tiled space is like entering a different world—one where design meets functionality in perfect harmony. I still remember the first time I encountered Satori Ceramic Wall Tile in a friend’s recently renovated bathroom. The light danced across the surface, creating a subtle interplay of shadow and brilliance that immediately captured my attention. “What is this?” I asked, running my fingers along the smooth yet textured surface. Her answer introduced me to what would become my go-to recommendation for clients and friends alike.
As someone who’s spent countless hours researching, installing, and living with various tile options, I’ve developed a keen eye for quality and value. Satori Ceramic Wall Tile stands out as an exceptional blend of aesthetic versatility, practical durability, and reasonable cost—a rare combination in today’s saturated market of home finishing products.
What Makes Satori Ceramic Wall Tile Special?
The word “Satori” originates from Japanese Zen Buddhism, referring to a moment of sudden enlightenment or awakening. It’s fitting, then, that these tiles often create an “aha” moment when you see them installed. Unlike mass-produced options that lack character, Satori tiles feature subtle variations and a distinctive depth that brings walls to life.
Manufactured using a proprietary blend of natural clays and minerals, Satori Ceramic Wall Tiles undergo a specialized firing process that results in their signature finish—neither completely matte nor overly glossy, but possessing a gentle luminosity that changes with the light throughout the day. This quality makes them particularly suited to spaces where atmosphere matters as much as function.
Each piece carries the hallmark of thoughtful design: precision-cut edges, consistent thickness, and surfaces engineered to both please the eye and stand up to real-world conditions. The brand has successfully positioned itself in the sweet spot between high-end artisanal tiles (with their prohibitive price tags) and budget options (with their obvious quality compromises).
Where to Find Satori Ceramic Wall Tile
If you’re eager to see these tiles in person—and I highly recommend you do, as photographs rarely capture their true essence—you have several options. Satori has established distribution networks with select specialty tile retailers across North America, focusing on partnerships with showrooms that emphasize customer education and design consultation.
National home improvement chains like Home Depot and Lowe’s have begun carrying limited selections of Satori tiles in their premium offerings section, though the variety may be restricted compared to dedicated tile outlets. For the most comprehensive selection, specialty retailers like Tile Shop, Floor & Decor, and regional tile boutiques typically offer the full Satori catalog along with display installations that showcase the tiles in realistic settings.
For those who prefer online shopping, Satori maintains an impressive digital presence. Their official website features detailed specifications, installation guides, and a visualization tool that allows you to preview different tile options in various settings. While you can’t purchase directly through their site, they provide a retailer locator tool and often have relationships with authorized online sellers who maintain inventory of their products.
The Investment: Understanding Satori Tile Pricing
Let’s talk numbers—because beautiful as they may be, affordability matters. Satori Ceramic Wall Tiles occupy what I consider the “accessible premium” segment of the market. They’re not the least expensive option on the shelf, but they offer remarkable value when you consider their longevity and aesthetic impact.
Current pricing typically ranges from $5 to $15 per square foot, depending on the specific collection, size, finish, and design complexity. The basic solid-color options in standard sizes represent the lower end of this range, while decorative pieces, larger formats, and specialty finishes command higher prices.
When budgeting for your project, remember that the tile itself is only part of the total investment. You’ll also need to account for:
- Setting materials (thinset mortar, typically $25-40 per bag)
- Grout ($15-30 per container)
- Sealer for grout lines ($15-25 per bottle)
- Tools if you’re installing yourself
- Professional installation if you’re hiring out (typically $5-10 per square foot, depending on complexity and region)
One cost-saving approach I often suggest is mixing Satori tiles with complementary but less expensive options in the same space. For example, use Satori for a stunning accent wall or backsplash focal point, while employing more budget-friendly tiles in less prominent areas.
Size Matters: Available Dimensions and Their Best Uses
Satori understands that different spaces demand different proportions. Their current catalog includes:
- Small format (1″×1″, 2″×2″, 3″×3″): Perfect for mosaic applications, shower floors with proper slope for drainage, and creating detailed patterns
- Standard formats (4″×4″, 6″×6″, 3″×6″, 4″×8″): The versatile workhorses of the collection, suitable for most wall applications
- Large formats (8″×8″, 12″×12″, 6″×12″, 8″×16″, 12″×24″): Create a more seamless look with fewer grout lines, ideal for making small spaces appear larger
- Specialty pieces: Bullnose edges, quarter rounds, chair rails, and decorative liners designed to create finished looks and transitions
I’ve found that mixing sizes can create visual interest without becoming chaotic—for instance, using larger format tiles for the majority of a shower wall, with smaller formats in a recessed niche or accent band. The clean, precise edges of Satori tiles make such combinations particularly effective, as the different sizes align beautifully without awkward transitions.
A Palette of Possibilities: Colors and Finishes
If there’s one area where Satori truly shines, it’s in the thoughtfully curated color palette and finish options they offer. Rather than overwhelming customers with hundreds of nearly indistinguishable options, they’ve focused on perfecting a selection of versatile, timeless colors organized into several distinct collections:
The Elements Collection: Earthy neutrals inspired by natural materials—soft beiges, warm taupes, gentle grays, and subtle creams. These colors create a perfect backdrop for almost any design style, from minimalist modern to rustic farmhouse.
The Vitality Series: Bolder, more saturated hues that make a statement—deep blues, forest greens, rich terracottas, and dramatic charcoals. These work beautifully as accent pieces or for creating focal points in otherwise neutral spaces.
The Serenity Line: Soft, atmospheric colors with subtle watercolor-like variations—pale blues, misty greens, blush pinks, and lavender grays. These create a sense of tranquility perfect for bathrooms and bedrooms.
The Metropolitan Collection: Urban-inspired tones with industrial undertones—concrete grays, metallic-influenced surfaces, and dark, sophisticated shades that work well in contemporary settings.
Finish options further multiply your design possibilities:
- Matte: Low-sheen, light-absorbing surfaces that create a soft, sophisticated look
- Satin: A gentle luster that reflects light subtly without high shine
- Gloss: Highly reflective surfaces that brighten spaces and create a clean, crisp appearance
- Textured: Subtle surface variations that add tactile interest and slip resistance
The magic often happens when combining different finishes within the same color family—perhaps using glossy tiles in a shower and matte-finished tiles of the same color on surrounding walls, creating subtle contrast while maintaining color harmony.
Practical Applications: Satori Tiles in Bathrooms and Kitchens
When it comes to the most demanding environments in our homes—the spaces where water, steam, food spills, and cleaning chemicals are daily realities—tile selection becomes particularly critical. Here’s where Satori’s engineering excellence becomes apparent.
Bathroom Applications
Satori ceramic tiles excel in bathroom environments, where their water-resistant properties and ease of cleaning make them an ideal choice. The non-porous glazed surface prevents water absorption, inhibiting mold and mildew growth—a critical consideration for spaces with frequent moisture exposure.
For shower walls, the larger format tiles (8″×16″ or 12″×24″) have become increasingly popular, reducing grout lines and creating a more seamless appearance. The precision-cut edges allow for tight grout lines (as narrow as 1/16″ with proper installation), further enhancing the clean, contemporary look many homeowners prefer.
When using Satori tiles on bathroom floors, it’s important to select appropriate textures. While the standard glazed finishes work beautifully on walls, the textured or “grip” finishes provide essential slip resistance for floor applications. The small format mosaics (2″×2″ or 1″×1″) also work well on shower floors, as the increased number of grout lines improves traction.
Kitchen Applications
In kitchen environments, Satori tiles face different challenges: food splatters, oil residue, acidic spills, and the potential for impacts from dropped utensils. The durable glaze holds up exceptionally well against staining agents, and the ceramic body resists chipping better than many comparably priced alternatives.
Backsplashes represent the most common kitchen application for Satori tiles, and for good reason. The variety of colors and finishes allows for perfect coordination with countertop materials and cabinetry, while the water-resistant properties protect the wall from cooking splatters and cleaning sprays.
The Backsplash Renaissance: Satori’s Perfect Application
Few tile applications have as much visual impact per square foot as the kitchen backsplash. This relatively small area carries enormous design weight, often serving as the focal point that ties together all other elements in the kitchen.
Satori tiles are particularly well-suited for backsplash installations for several reasons:
- The color consistency across production runs means you can confidently purchase additional tiles for future repairs or extensions without worrying about noticeable differences.
- The precise dimensional consistency makes installation more straightforward, especially important in backsplashes where tiles must align perfectly with cabinets, outlets, and countertops.
- The variety of decorative options and accent pieces allows for creative expression without custom-ordering specialty tiles at premium prices.
When planning a Satori backsplash, consider these design approaches that I’ve seen work beautifully:
- The Classic Subway Layout: Using 3″×6″ tiles in a traditional offset pattern, but with a twist—perhaps in an unexpected color or with a contrasting grout.
- The Vertical Statement: Taking those same subway tiles but arranging them in vertical columns for a contemporary interpretation that draws the eye upward and emphasizes ceiling height.
- Geometric Interest: Utilizing small format hexagons or arabesque shapes to create a subtly textured surface that adds dimension without overwhelming the space.
- The Feature Moment: Installing a dramatic focal point behind the range using decorative or patterned Satori tiles, surrounded by complementary solid tiles in the remainder of the backsplash area.
Durability in Demanding Environments
When investing in tile for high-moisture areas, durability concerns naturally arise. Will these tiles stand the test of time in spaces where water exposure is constant? How will they hold up to the rigors of daily use and cleaning?
Satori ceramic tiles are engineered specifically for wall applications in wet environments. The manufacturing process includes a high-temperature firing that creates a dense, resilient body, while the glazed surface provides an impermeable barrier against water penetration.
What sets Satori apart from budget alternatives is the thickness and quality of this glaze layer. While inexpensive ceramic tiles often show wear paths in their glaze after just a few years of regular cleaning, Satori’s commercial-grade glazing maintains its appearance even with daily maintenance and exposure to common bathroom and kitchen chemicals.
The color stability also deserves mention—the pigments used in Satori tiles are fired into the glaze rather than applied as a surface treatment, meaning they resist fading even in bathrooms with windows that admit UV light or in kitchens with strong task lighting.
Installation Insights: DIY Potential and Professional Considerations
Having installed various tile products both professionally and in my own home renovations, I can attest that the installation process significantly impacts the final result—perhaps even more than the quality of the tile itself in some cases.
DIY Suitability
Satori tiles are relatively DIY-friendly for those with basic tiling experience. The consistent dimensions reduce the need for excessive adjustments during installation, and the quality of the tile body means less breakage and waste compared to more brittle economy options.
For a successful DIY installation, you’ll need:
- Proper Substrate Preparation: Ensure your wall surface is flat, clean, and appropriate for tile application. Cement backer board is ideal for wet areas, while properly prepared drywall can work in drier zones.
- Quality Tools: Invest in a good tile cutter appropriate for ceramic tiles (wet saws work best for complex cuts), reliable trowels, spacers, and a rubber float for grout application.
- Patience and Planning: Layout planning is critical—take time to dry-lay tiles and consider how they’ll interact with fixtures, edges, and focal points in the room.
Professional Installation Considerations
If hiring professionals (often the wisest choice for large or complex installations), look for installers with specific experience working with ceramic wall tiles rather than just floor tile specialists. Wall installations present unique challenges related to gravity, layout, and fixture integration.
A knowledgeable installer will:
- Begin with a perfectly level reference line rather than assuming walls are straight
- Suggest optimal layout options to minimize awkward cuts around fixtures and edges
- Recommend appropriate setting materials based on specific project conditions
- Provide guidance on expansion joint requirements for larger installations
The Grouting Decision: Critical Choices for Lasting Beauty
Satori ceramic tiles, like all tiles, require grout—the filling material that occupies the space between individual tiles. However, the grout selection and application dramatically affect both the aesthetic and functional performance of your installation.
Grout Options for Satori Tiles
- Sanded vs. Unsanded: For most Satori tile installations with standard 1/8″ grout lines, unsanded grout is ideal, providing a smoother finish that complements the refined surface of the tiles. For installations with wider grout lines (over 1/8″), sanded grout provides necessary structural stability.
- Traditional vs. Epoxy: While traditional cement-based grouts are more affordable and easier to work with, epoxy grouts offer superior stain resistance and durability—particularly valuable in shower installations and kitchen backsplashes where grout is exposed to potential staining agents.
- Color Selection: Grout color dramatically impacts the final appearance. Matching grout creates a seamless look where tiles visually flow together, while contrasting grout emphasizes the pattern and geometry of the installation.
Proper Grouting Technique
Whether DIY or professional, proper grouting technique is essential for both appearance and performance:
- Allow adequate curing time for setting materials before grouting (typically 24-48 hours)
- Mix grout precisely according to manufacturer specifications
- Apply with a rubber float at a 45-degree angle to the grout lines
- Clean tile surfaces promptly but gently before grout fully sets
- Allow proper curing before exposing to moisture
- Apply sealer to cement-based grouts after curing (epoxy grouts typically don’t require sealer)
The Tactile Experience: Texture Considerations
While photographs can convey color and pattern, they rarely communicate the tactile quality of tiles—an element that significantly influences how we experience a space. Satori tiles offer several texture options that balance aesthetic considerations with practical performance:
Smooth: The classic option, with a perfectly flat surface that’s easy to clean and visually quiet. Ideal for larger installations where other elements provide textural interest.
Subtle Relief: A gentle surface variation that creates delicate shadow play without creating cleaning challenges. These work beautifully in spaces with directional lighting that can highlight the subtle dimensionality.
Structured: More pronounced three-dimensional surfaces that create dramatic shadow effects and tactile interest. These make powerful statements in smaller applications like feature walls or backsplash accent bands.
Textured Matte: A microscopically textured surface that maintains a matte appearance while offering improved grip—particularly valuable for areas where some moisture might contact the surface.
When selecting textures, consider both the lighting conditions and the viewing distance. Subtle textures often disappear in evenly lit spaces but come alive with angular lighting, while more pronounced textures create impact even under diffuse illumination.
Water Resistance: Understanding Performance Expectations
A common question concerns the water resistance of ceramic wall tiles. Let me clarify some important distinctions:
Satori Ceramic Wall Tiles themselves are highly water-resistant thanks to their glazed surface, which forms an impermeable barrier against moisture penetration. However, a complete tile installation’s water resistance depends on multiple factors:
- The Substrate: The material behind the tiles must be appropriate for the moisture level expected
- The Setting Materials: Thinset mortar must be properly mixed and applied for adequate coverage
- The Grout: Properly mixed, applied, and (when necessary) sealed
- The Perimeter Sealing: Silicone or other appropriate sealant at transitions and penetrations
In consistently wet areas like shower walls, these factors become particularly critical. While the Satori tiles themselves will perform admirably, the overall installation system determines true waterproofing effectiveness.
For absolute water protection in showers and tub surrounds, a comprehensive waterproofing system beneath the tiles (such as a membrane or waterproof backer board with sealed seams) is essential, regardless of the quality of the tiles themselves.
Maintenance Made Simple: Keeping Satori Tiles Beautiful
One of the primary advantages of Satori Ceramic Wall Tiles is their remarkably low maintenance requirements compared to natural stone or unglazed tile options. A simple care routine will keep them looking fresh for decades:
Routine Cleaning
For day-to-day cleaning, a gentle wipe with a soft cloth or sponge dampened with warm water is often sufficient. For more thorough cleaning:
- Use a pH-neutral cleaner specifically formulated for ceramic tiles
- Avoid abrasive cleaners or scrubbing pads that could eventually dull the glaze
- Clean in a circular motion rather than aggressive back-and-forth scrubbing
- Rinse thoroughly with clean water to prevent cleaner residue
- Dry with a soft cloth to prevent water spots, particularly on glossier finishes
Addressing Specific Challenges
- Soap Scum in Showers: Use a commercial soap scum remover formulated for ceramic tile, applied with a soft sponge
- Cooking Residue on Backsplashes: A gentle degreasing cleaner works well, followed by thorough rinsing
- Hard Water Deposits: A 50/50 solution of white vinegar and water, allowed to sit briefly before wiping and rinsing
Grout Maintenance
The grout lines typically require more attention than the tiles themselves:
- For standard cement-based grout, apply a penetrating sealer every 1-2 years (more frequently in heavy-use shower areas)
- For persistent grout staining, a soft brush with oxygen-based cleaner often restores appearance
- For severely stained grout, professionals offer color sealing services that both restore appearance and provide ongoing protection
Sealing Requirements: Less Than You Might Think
Unlike natural stone tiles that require regular sealing of the tile surface itself, Satori Ceramic Wall Tiles generally do not need sealing. The fired glaze creates a naturally impervious surface that resists staining and moisture penetration without additional treatment.
However, if your installation includes any unglazed decorative pieces or accents (such as certain trim pieces or artistic inserts), these specific elements may benefit from sealer application according to manufacturer recommendations.
As mentioned earlier, the grout is typically the element requiring sealing, not the tile itself. This represents a significant maintenance advantage over natural stone options like marble or travertine, which require regular sealing of the entire surface to prevent staining and moisture damage.
Real-World Performance: What Users Are Saying
Having specified Satori tiles for numerous projects over the years, I’ve had the opportunity to gather feedback from clients living with these products daily. The consensus has been overwhelmingly positive, with particular praise for:
- Color Consistency: Even across different purchase batches, the color matching has proven reliable—important for phased renovations or future repairs.
- Cleaning Ease: Many users report being able to maintain their Satori tile installations with nothing more than water and occasional mild soap, appreciating the reduced need for specialty cleaners.
- Durability: Installations from 5+ years ago continue to look fresh and unmarred by the typical wear patterns seen in lesser-quality tiles, where the glaze begins to show microscopic scratching from routine cleaning.
- Aesthetic Longevity: The thoughtfully curated colors and patterns have proven to have staying power beyond trendy alternatives that quickly date themselves.
The few criticisms I’ve encountered typically relate to installation challenges rather than the product itself—a reminder of the importance of proper installation technique and appropriate setting materials.
Ceramic vs. Porcelain: Understanding the Distinction
When researching tile options, you’ll inevitably encounter comparisons between ceramic and porcelain tiles. While both are clay-based products fired at high temperatures, there are meaningful differences worth understanding:
Porcelain tiles are fired at higher temperatures and typically have a lower water absorption rate than ceramic tiles, making them particularly suitable for floor applications and outdoor use where freeze-thaw conditions may occur. They’re generally denser and harder than ceramic tiles.
Satori Ceramic Wall Tiles are specifically engineered for vertical applications, where the slightly lighter weight of ceramic (compared to porcelain) is actually advantageous for wall installation. The glazed surface provides the water resistance needed for wet areas, while the ceramic body offers:
- Easier cutting and drilling for fixtures and outlets
- Less weight stress on wall substrates
- Generally lower cost than comparable porcelain options
- Often warmer tactile feel than denser porcelain
For most interior wall applications, properly manufactured ceramic tile like Satori provides all the performance characteristics needed without the additional cost of porcelain. The exception would be exterior applications or floors, where porcelain’s additional density and frost resistance become important factors.
Brand Comparisons: How Satori Stacks Up
The ceramic tile market includes numerous players across different price points and quality tiers. How does Satori compare to other common brands?
Versus Budget Brands (like traditional home improvement store house brands):
- Satori offers noticeably superior dimensional consistency, reducing installation headaches
- The glaze quality shows significant improvement, with greater depth and clarity
- Color options are more sophisticated and curated rather than simply “basic”
- Longevity is substantially better, making them more economical over time despite higher initial cost
Versus Mid-Range Competitors (like American Olean, Daltile):
- Comparable technical specifications and quality
- Satori often provides more distinctive aesthetic options and surface finishes
- Pricing is generally similar for equivalent product tiers
- Availability may be more limited depending on your location
Versus Premium Imports (like Italian and Spanish brands):
- Premium imports often offer more artistic and avant-garde designs
- Satori provides comparable technical performance at often lower price points
- Availability and lead time typically favor Satori over imported options
- Consistency between production runs is often superior with Satori
For most residential applications, Satori hits the sweet spot of quality, aesthetics, availability, and value—offering near-premium performance without the premium price tag that often comes with imported European tiles.
Decorative Options: Beyond Basic Field Tiles
While solid-colored field tiles form the foundation of most installations, Satori’s decorative options allow for personalization and visual interest. Current offerings include:
Mosaic Sheets: Pre-mounted arrangements of smaller tiles in coordinating or contrasting colors, simplifying the installation of complex patterns.
Decorative Reliefs: Individual tiles with three-dimensional patterns that can be interspersed with flat field tiles to create rhythm and interest.
Artistic Series: Limited collections featuring hand-applied techniques that create unique visual effects while maintaining practical performance characteristics.
Dimensional Accents: Tiles with sculptural elements that project from the wall, creating dramatic shadow effects.
Border and Trim Pieces: Specialized profiles designed to create finished edges, transitions between materials, or frame focal areas.
These decorative options can be used in various ways:
- As accent bands within larger field tile installations
- For creating distinctive feature walls or backsplash focal points
- To add subtle interest in shower niches or around fixture penetrations
- For framing mirror surrounds or defining transitions between spaces
The most successful designs I’ve seen typically use decorative elements judiciously, allowing them to serve as “jewelry” that enhances rather than competes with the overall space.
Finding Value: Sales, Clearance, and Economizing Strategies
Quality tile represents a significant investment in your home, but several strategies can help manage costs when working with Satori products:
Timing Your Purchase
Most tile retailers run periodic sales, often coinciding with:
- End-of-quarter inventory reduction events
- Holiday weekend promotions
- Annual or semi-annual clearance events
Planning your purchase around these cycles can yield savings of 15-25% on regular pricing.
Clearance Opportunities
Discontinued colors and patterns often become available at substantial discounts. While selection may be limited, these clearance options can provide exceptional value if you’re flexible on specific colors or willing to design around available inventory.
Mix-and-Match Approaches
Consider using Satori tiles for high-visibility areas while employing less expensive options in secondary spaces. For example:
- Satori for shower walls visible upon entering the bathroom, with budget tile for less visible areas
- Premium decorative Satori pieces as accents within a field of more affordable basic tiles
- Satori for the backsplash behind the range, transitioning to less expensive complementary tiles in peripheral areas
Optimizing Coverage
Careful planning can reduce waste and maximize efficiency:
- Precise measurement and layout planning to minimize cuts and waste
- Considering slightly larger grout lines (1/8″ instead of 1/16″) to cover more area with fewer tiles
- Using decorative borders to frame smaller areas of specialty tiles rather than covering entire surfaces
DIY Potential: Assessment and Preparation
For budget-conscious homeowners with some basic skills, Satori tiles offer good potential for successful DIY installation. However, realistic self-assessment is crucial before committing to this approach.
Skill Requirements
Successful tile installation requires:
- Precision in measuring and cutting
- Patience for proper substrate preparation
- Physical stamina for the repetitive work involved
- Attention to detail, particularly for grout application and cleanup
- Basic understanding of construction principles regarding level, plumb, and square
Project Scope Considerations
DIY installation is most appropriate for:
- Smaller areas (under 100 square feet)
- Relatively simple layouts without complex patterns
- Spaces with minimal fixture cutouts or obstacles
- Projects where timeline flexibility exists
For larger, more complex installations, professional installation often proves more economical in the long run when considering the potential for costly mistakes, extended project timelines, and the value of professional warranties.
Preparation for Success
If proceeding with DIY installation:
- Research thoroughly—watch multiple instructional videos specific to ceramic wall tile
- Purchase appropriate tools—quality matters for precision cutting and application
- Buy approximately 10% extra tile to account for breakage and cuts
- Practice techniques on a small mock-up before tackling the full installation
- Allow significantly more time than professional estimates suggest
- Prepare adjacent areas carefully to prevent damage during installation
Conclusion: Making the Right Tile Choice for Your Space
After exploring the world of Satori Ceramic Wall Tiles in considerable depth, the question remains: are they the right choice for your specific project? The answer depends on your unique combination of priorities, preferences, and practical considerations.
Satori tiles excel when:
- You value long-term performance and appearance retention
- Your aesthetic preferences lean toward refined, sophisticated options
- The installation will be in daily-use areas where quality differences become apparent over time
- You appreciate thoughtful curation rather than overwhelming options
- Your budget allows for investing in materials that will outlast trend cycles
The true value proposition of Satori lies not just in the immediate visual impact—though that is certainly significant—but in the day-to-day living experience and long-term performance. These are tiles that reveal their quality in subtle ways: the ease of maintenance, the consistent appearance after years of use, and the timeless quality that transcends design trends.
Whether creating a serene bathroom retreat, a practical yet beautiful kitchen workspace, or any other tiled surface in your home, Satori Ceramic Wall Tiles offer that elusive combination of beauty, performance, and value that makes them worth serious consideration for your next project.
The journey to a beautifully tiled space involves many decisions, but the foundation of that journey—the tile itself—deserves careful consideration. In a world of rapidly changing trends and variable quality, Satori has established itself as a reliable constant, delivering products that consistently meet and exceed expectations for both aesthetics and performance.